
Turning a Markdown file into a PDF is a common task, but the best way to do it isn't always obvious. You've got options ranging from powerful command-line tools like Pandoc for total control, to handy extensions in code editors like VS Code for quick exports, and even Node.js packages for automated workflows.
The right method really hinges on what you’re trying to achieve—whether it’s a one-off conversion for a report or building a full-blown documentation pipeline.
Choosing the Right MD to PDF Conversion Tool
So, how do you decide? With so many choices, from command-line wizards to slick editor plugins, it's easy to get stuck. The trick is to match the tool to your specific project and workflow. A hefty, feature-rich converter is overkill for simple meeting notes, just as a basic "print to PDF" function won't cut it for a complex technical manual.
The decision usually boils down to a few practical questions. Are you already living in a code editor like VS Code? Do you need to generate documents automatically as part of a script or build process? Or are you just after a quick, no-fuss conversion without installing a bunch of new software? Your answers will point you to the perfect tool.
Finding Your Ideal Conversion Workflow
For developers, technical writers, and anyone who values efficiency, embedding the conversion process into your existing environment is a game-changer. It saves precious time and keeps you focused. A tool like Pandoc gives you granular control over every aspect of the output—from styling and metadata to complex citations—making it the gold standard for academic papers and in-depth documentation.
If you prefer a more visual approach, an editor like Typora or a good VS Code extension offers a much more direct experience. These tools often provide a live preview, so what you see is what you get. Exporting is usually just a click away, which is perfect for everyday documents like project updates or personal notes. For a deeper dive, our guide on working with Markdown files explores a variety of tools and techniques.
My take on it: The best conversion method is the one you don't have to think about. It should slot right into your daily routine. Whether that's a powerful script that handles hundreds of files or a simple plugin for a quick export, the goal is to make PDF generation a seamless final step, not another hurdle.
This flowchart breaks down the decision-making process based on what matters most to you: automation, editor integration, or pure speed.
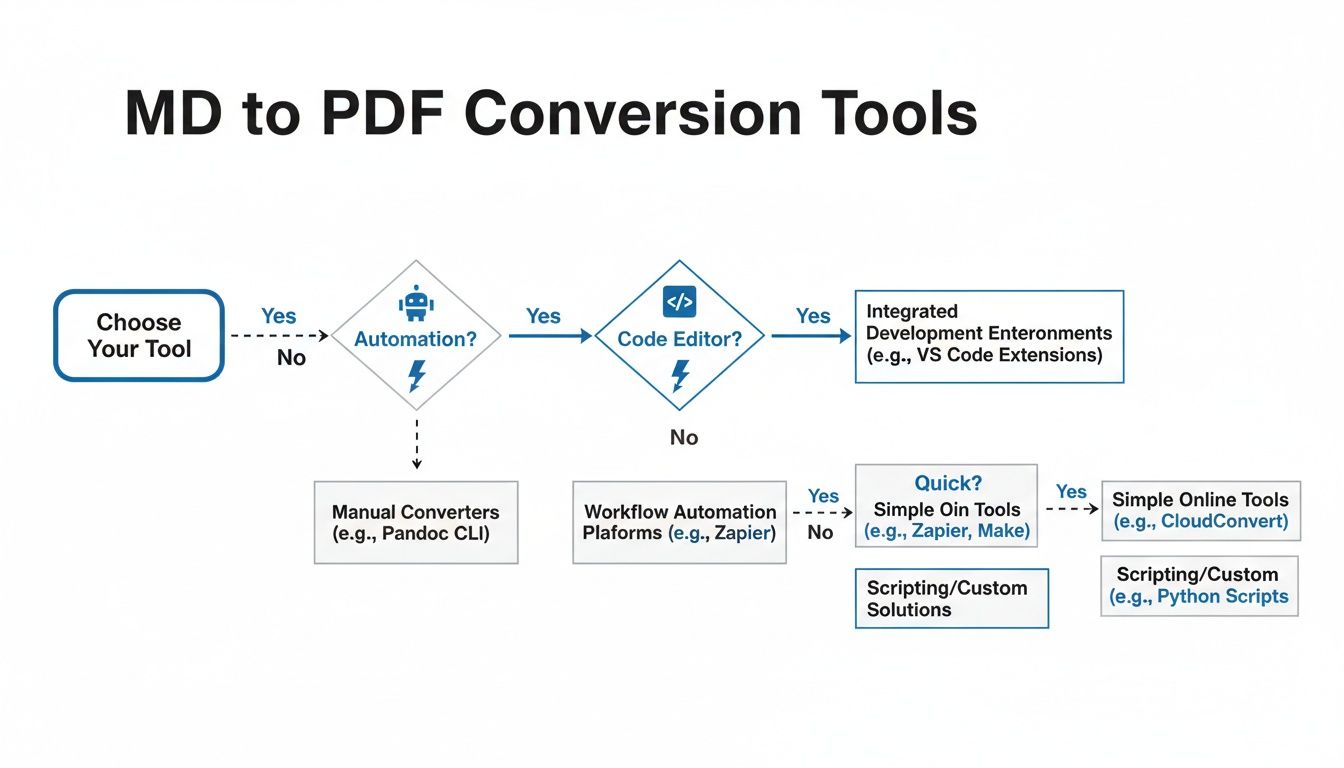
As the chart shows, your need for automation and your preferred coding environment will naturally guide you to the right category of tools.
MD to PDF Conversion Methods at a Glance
To help you decide quickly, here’s a simple breakdown of the most common methods. This table should give you a good idea of where to start based on your comfort level with technical tools and what you need to accomplish.
| Method | Ideal for | Key Feature | Technical Skill |
|---|---|---|---|
| Pandoc | Technical documents, academic papers, and batch processing. | Unmatched control over styling, templates, and formats. | Intermediate/Advanced |
| VS Code/Typora | Developers, writers, and anyone needing a quick visual export. | Integrated workflow with live previews and simple UI. | Beginner |
| Browser Print | The fastest, simplest one-off conversions. | No software installation is needed; universally available. | Beginner |
| Node.js Packages | Automated documentation pipelines and web applications. | Programmatic control for integration with other systems. | Advanced |
Ultimately, the best tool is the one that gets the job done with the least amount of friction for your particular use case.
Why a Standardised Format Matters
Having a reliable md to pdf workflow is becoming essential, particularly in professional environments. In Belgium, for example, the move toward PDF for official documents is accelerating. Organisations want the flexibility of plain-text source files (like Markdown) but need the consistency of a fixed-layout format for distribution and archiving.
A recent survey highlighted this trend: of the 62% of public-sector agencies using plain-text formats for authoring, a staggering 78% regularly convert them to PDF. This clearly shows the demand for a dual-format strategy. It allows teams to collaborate using version control on the source text while ensuring the final, published document is professional, accessible, and looks the same for everyone.
Creating Polished PDFs with Pandoc and LaTeX
When a quick "Save As PDF" just won't cut it, it's time to bring out the heavy machinery: Pandoc. Think of it as the ultimate document converter. For anyone serious about creating truly professional, typeset-quality documents from plain Markdown, pairing Pandoc with a LaTeX distribution is the gold standard.
This combination is what you use when the details really matter. It's the go-to workflow for academic papers, in-depth technical manuals, and any document where typography, citations, and a clean structure are non-negotiable. You get to write in simple, clutter-free Markdown, while Pandoc and LaTeX do the heavy lifting of complex typesetting in the background.
The Power of the Command Line
The real beauty of this approach lies in its precision. With a single, well-crafted command, you can transform a humble report.md file into a beautiful report.pdf. It can even pull metadata like the title, author, and date directly from a YAML block at the top of your Markdown file.
Here's a glimpse of Pandoc's homepage, which gives you an idea of just how versatile it is.
This versatility is Pandoc’s core strength. It acts as a universal translator for documents, making the md to pdf conversion just one of its many tricks.
A basic conversion command is simple enough, but the real power is unlocked through customisation. You can point it to a bibliography file, tell it to generate a table of contents, and even apply a custom LaTeX template to control every single visual element, from page margins to heading fonts. For creating consistently high-quality PDFs, this method is incredibly robust. For more tips on what to do with your final documents, explore our guide on managing PDF files.
Setting Up Your Environment
To get all this working, you'll need two key pieces of software installed on your system:
- Pandoc: This is the converter itself. You can find straightforward installers for Windows, macOS, and Linux.
- A TeX Distribution: This is the LaTeX engine that Pandoc uses behind the scenes to build the PDF. Popular choices are MiKTeX for Windows, MacTeX for macOS, or TeX Live for Linux.
Once they're installed, you're ready to run commands from your terminal. This setup isn't just for one-off conversions; it’s built for automation. In fact, it's so reliable that it's a staple in professional pipelines. A study of 34 Belgian software teams revealed that 70% automated their md to pdf generation within their CI pipelines, often using Pandoc with LaTeX to enforce brand guidelines and accessibility standards. You can learn more about how professionals utilise these tools for document conversion.
The real magic happens when you step away from the defaults. By creating your own LaTeX template or using one from the community, you can define a unique "house style" for all your documents. This ensures every PDF you produce looks perfectly on-brand and professional.
Advanced Customisation and Examples
Let's walk through a more advanced, real-world example. Imagine you're writing a research paper where you need proper citations, a table of contents, and specific metadata.
You'd start your Markdown file with a YAML block at the very top:
title: "The Impact of AI on Modern Web Development" author: "Alex Chen" date: "October 26, 2024" bibliography: references.bib
Your references.bib file would hold all your citations in standard BibTeX format. Then, within your Markdown text, you can reference them using simple keys like [@chen2023].
Finally, you'd run a command to bring it all together:
pandoc report.md --from markdown --to pdf --output report.pdf --toc
This command tells Pandoc to convert report.md, generate a PDF, and automatically add a table of contents (--toc). It will also find references.bib, process your citations, and create a perfectly formatted bibliography at the end of the document. This is the kind of powerful automation that makes the Pandoc and LaTeX workflow so efficient for complex documents.
Converting MD to PDF Directly in Your Code Editor
For most of us who live in a code editor, context switching is a major productivity killer. Leaving your familiar environment just to convert a file feels clunky and unnecessary. The good news is, you don't have to. You can generate professional-looking PDFs right from your favourite editor, slotting the conversion process neatly into your existing workflow.
This approach keeps you in the zone, whether you're quickly spinning up a report, drafting documentation, or just jotting down meeting notes. Most modern editors have a rich ecosystem of extensions that turn this into a one-click or single-command task.
Using Visual Studio Code Extensions
Visual Studio Code (VS Code) is a powerhouse, largely thanks to its massive extension marketplace. When it comes to Markdown conversion, you’ve got options, but one of the most reliable and straightforward is Markdown PDF. It’s lightweight, simple to set up, and just works.
After you've installed it, the extension adds a new command right into your VS Code interface. Open your Markdown file, pop open the command palette or right-click, and select "Markdown PDF: Export (pdf)". That's literally all it takes. A polished PDF will appear in the same directory, ready for you to share.
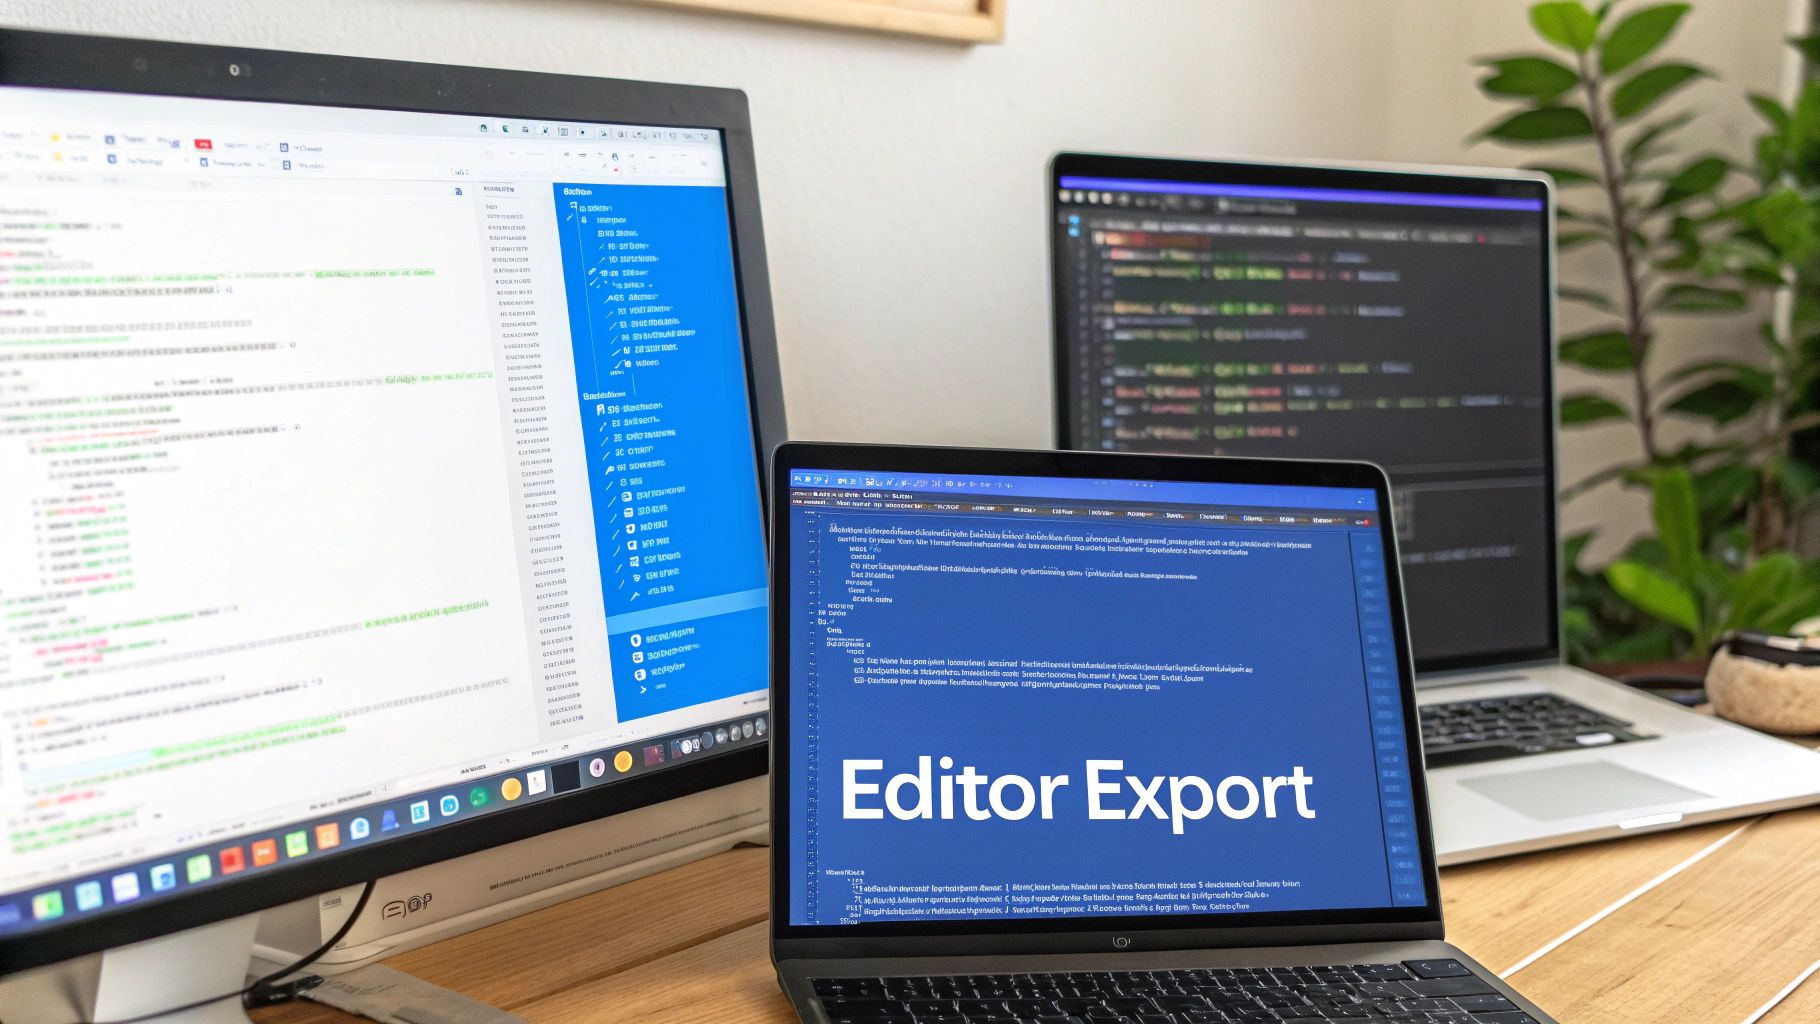
Below is a snapshot of the kind of clean, focused environment VS Code provides, where extensions like this can be seamlessly integrated.

This image captures how a streamlined writing space helps in creating well-structured documents that are perfect for PDF conversion.
Where an extension like Markdown PDF really shines, though, is in its customisation. By tweaking your settings.json file, you can dial in the output to match your exact needs. Here are a few things I often adjust:
- Custom Styling: Point the extension to a local CSS file to define your own fonts, colours, and layouts. This is brilliant for brand consistency.
- Headers and Footers: Easily add custom headers and footers with page numbers, dates, or the document title.
- Page Formatting: Flip the orientation to landscape or switch between paper sizes like A4 and Letter with a simple setting.
This level of control means you can produce consistent, on-brand documents time and time again, all without ever leaving your editor.
The WYSIWYG Editor Approach with Typora
While VS Code extensions are incredibly powerful, maybe you prefer a more visual, "What You See Is What You Get" (WYSIWYG) experience. If that sounds like you, then an editor like Typora is an absolute game-changer. It renders your Markdown live as you type, so there’s no guesswork.
Typora is built from the ground up to be a distraction-free writing tool. It completely removes the disconnect between writing the Markdown syntax and seeing the final, formatted output, making the whole process feel incredibly fluid.
With Typora, there's no split-screen preview window to worry about—the editor is the preview. When your document looks right and you're ready to convert it, the process couldn't be simpler. Just go to File > Export > PDF.
This one-click export makes Typora a firm favourite for writers and anyone who needs to produce beautifully formatted documents with minimal fuss. It’s an elegant solution for those who value simplicity and immediate visual feedback.
Styling Your PDFs with Custom CSS
A standard Markdown to PDF conversion will give you a clean, usable document. But let's be honest, "usable" doesn't always cut it. When you need to match your company's branding or just want a document that looks professionally polished, the default output often falls short. This is where you can bring in Cascading Style Sheets (CSS) to take complete control over how your final PDF looks and feels.
The magic behind custom styling lies in how many modern tools handle the conversion. Popular Visual Studio Code extensions like Markdown PDF and a lot of Node.js packages don't go straight from Markdown to PDF. Instead, they first render your Markdown into an intermediate HTML page using a headless browser like Chromium, and then "print" that page to a PDF file. This gives you a fantastic opportunity to inject your own styles.
If you're curious about the underlying mechanics, it helps to understand how browsers structure these files. You can find more detail in guides about managing HTML files.
Linking Your Custom Stylesheet
Getting your styles into the mix is usually quite simple. In most editor extensions, you just need to point the tool to your CSS file. For example, with VS Code's Markdown PDF extension, all it takes is adding one line to your settings.json file:
"markdown-pdf.styles": ["/path/to/your/custom-styles.css"]
This tells the converter to fetch and apply your stylesheet right before generating the PDF. It’s a brilliant way to keep a consistent visual style across all your project's documentation.
Honestly, the biggest improvements often come from small tweaks to typography and spacing. Just picking a good font, increasing the line height for better readability, and setting sensible page margins can completely transform a basic document into something that looks expertly designed.
Practical CSS Snippets for PDF Styling
You don't need to be a CSS wizard to make a real difference. A handful of well-chosen rules can dramatically improve your PDF's appearance. Here are a few practical examples to get you going:
- Set a Professional Font and Page Layout: This snippet sets a clean, readable foundation by defining the page size, margins, and a professional default font.
- Improve Heading Appearance: Make your document easier to scan by giving headings a distinct colour and bolder font weight.
- Customise Code Blocks: A common pain point in technical documents is unreadable code. This rule adds a subtle background, some padding, and ensures long lines of code wrap properly instead of overflowing off the page.
Here’s a small CSS template you can copy and adapt. It covers the basics for page setup, typography, and styling for common elements like code blocks and blockquotes.
/* Starter CSS for MD to PDF Styling / @page { size: A4; margin: 2cm; } body { font-family: 'Helvetica Neue', Arial, sans-serif; line-height: 1.6; color: #333; } h1, h2, h3 { color: #2c3e50; font-weight: 600; } pre { background-color: #f8f8f8; padding: 1rem; border-radius: 4px; white-space: pre-wrap; / Ensures code wraps */ word-wrap: break-word; } blockquote { border-left: 3px solid #7f8c8d; padding-left: 1rem; color: #666; font-style: italic; }
By keeping all your styling rules in a single CSS file, you create a central source of truth. This makes it incredibly easy to apply a consistent and professional brand identity to every single PDF you generate.
Automating PDF Generation with GitHub Actions
Converting a file here and there by hand is fine. But when you’re managing serious documentation, manual conversions quickly become a bottleneck. Automation is the only way to guarantee consistency and save yourself a ton of time.
Imagine this: you push an update to your project’s documentation, and within minutes, a perfectly styled PDF is automatically generated and ready to go. That’s the power of a CI/CD pipeline. Using GitHub Actions, you can build a brilliant md to pdf workflow that just works.
This "docs-as-code" approach means your official PDF documentation is never out of date. It’s the perfect setup for user manuals, API guides, and technical reports that evolve alongside your project.
Building Your CI/CD Workflow
The magic happens inside a YAML file, which you’ll place in your repository’s .github/workflows/ directory. This little file tells GitHub what to do and when to do it—for instance, triggering the conversion process every time you push to the main branch.
For a really solid md to pdf conversion, the best practice is to use a Docker container that comes with Pandoc and a TeX distribution pre-installed. Why? Because it creates a self-contained, reproducible environment. Your conversion will run exactly the same way every single time, no matter what.
GitHub's interface makes it easy to see what’s happening. You can watch your workflows run, check their status, and grab the results, like your freshly minted PDF.
A Real-World Workflow Example
Let's get practical. Here’s a workflow you can pretty much copy and paste into your own project. It’s designed to automatically convert a file named documentation.md into documentation.pdf.
Here’s what it does, step-by-step:
- Triggers on Push: The action kicks off whenever you push new code to the
mainbranch. - Uses a Docker Container: It pulls a specific Pandoc container, so all the tricky dependencies like LaTeX are already sorted.
- Runs the Conversion: It executes the Pandoc command to turn your Markdown into a PDF.
- Uploads the Result: The final PDF is saved as a build "artifact," which you can download straight from the GitHub Actions summary page.
This isn’t just a nice-to-have; it’s a massive productivity gain. Research from Belgian higher-education institutions found that using automated toolchains like Pandoc slashed the average time spent on report formatting by an incredible 48%. What's more, 58% of these institutions created shared CI templates or container images to standardise how they handle conversions. You can read more about these insights on professional document automation.
By automating your
md to pdfprocess with GitHub Actions, you eliminate repetitive manual work and ensure that your published documents are always derived from the latest source. It's a foundational practice for maintaining high-quality, professional documentation with minimal effort.
Common Questions About MD to PDF Conversion
Even with the best tools in your arsenal, converting Markdown to PDF can sometimes throw a curveball. We've all been there: quirky font rendering, images that refuse to cooperate, or code blocks that just look wrong. Let's tackle some of the most frequent questions I hear, helping you sidestep common issues and refine your md to pdf process.
Most of these hurdles pop up because of how different conversion engines interpret your source files. It makes a difference whether you're using Pandoc with its LaTeX backend or a VS Code extension that relies on a headless browser. Getting a feel for what’s happening under the hood is often the key to fixing the problem.
Solving Image and Asset Path Problems
One of the most common frustrations is seeing broken images in your final PDF. This almost always boils down to an incorrect file path. It’s a classic trap: a relative path like ../images/diagram.png might look perfect in your editor's live preview.
The catch is that the conversion tool might be running from a different working directory. When that happens, it can't find your assets, and you're left with an empty box where your beautiful diagram should be.
To get around this, you have a couple of solid options:
- Use Absolute Paths: This isn't the most portable solution, but providing the full, explicit path to an image is a foolproof way to make sure it's found.
- Keep Assets Together: This is my preferred method. I make it a habit to put all my images into a single folder (e.g.,
assets/) right alongside my Markdown file. This keeps relative paths simple and reliable, like./assets/diagram.png.
I’ve found that consistency is crucial. Before starting any project, I create a standard directory structure for my Markdown files and associated images. This simple discipline prevents 99% of path-related headaches down the line.
Handling Fonts and Special Characters
Have you ever generated a PDF only to find your special characters or emojis have morphed into strange, unreadable symbols? That’s a classic font encoding issue, almost always related to UTF-8 support.
The problem usually happens when the PDF engine defaults to an older font that doesn't include the specific characters, or glyphs, you're trying to use. If you’re using a powerful tool like Pandoc with LaTeX, you might need to tell it to use a more modern, Unicode-aware typesetting engine like xelatex or lualatex.
A quick fix in a Pandoc command is to add the --pdf-engine=xelatex flag. If you’re taking a CSS-based approach, make sure your stylesheet explicitly calls for a font with broad character support.
This simple adjustment ensures that everything from accented letters to technical symbols renders exactly as you intended, keeping your documents looking professional and readable.
Ready to stop wrestling with command lines and configuration files? With Hostmora, you can turn your Markdown files into beautiful, shareable web pages or documents in seconds. Just drag, drop, and publish. Experience the simplest way to go live at Hostmora.