

Getting your website online doesn't have to be a costly or complex affair. In fact, you can host a static website for free by taking advantage of modern platforms that offer surprisingly generous "forever-free" plans. These services are perfect for getting portfolios, small business sites, and personal projects up and running with professional speed and features—all without spending a dime.
Why Free Static Hosting Is Your Best First Step

Opting to host your static site for free is a savvy, low-risk way to build a web presence. Unlike dynamic sites that constantly need to talk to a database and run server-side code, a static site is just a collection of straightforward HTML, CSS, and JavaScript files. And that simplicity is its superpower.
Because the files are already built, they can be delivered to visitors in a flash from a global network of servers—what's known as a Content Delivery Network (CDN). The result is ridiculously fast load times, which is a huge win for both your visitors and your search engine rankings.
The Perks of Starting with Free Hosting
When you're just getting a project off the ground, keeping costs down is everything. Free hosting completely removes that financial hurdle, letting you pour your energy into creating killer content and a great design instead of worrying about server bills. You get to tap into the kind of high-end infrastructure that, not too long ago, only big companies could afford.
Here’s why this approach works so well:
- Zero Cost: You can get your site live without ever reaching for your wallet. It's the perfect setup for testing out an idea, showcasing your work, or launching a small business on a shoestring budget.
- Tighter Security: With no database or complex server software to worry about, you dramatically shrink the surface area for potential attacks. Static sites are just inherently tougher to hack.
- Blazing-Fast Performance: Since static sites serve pre-made files straight from a CDN, they are incredibly fast for users no matter where they are in the world.
- Simple Workflow: Forget wrestling with complex control panels. Modern platforms like Hostmora offer simple drag-and-drop deployment, taking the headache out of traditional hosting.
The web hosting market is booming, expected to hit an incredible USD 527.07 billion by 2032. A big driver of this growth comes from free and freemium services that empower creators and small businesses to get online without any upfront costs. You can read more about the web hosting market growth to see just how big this trend is.
A static site cuts out so much unnecessary complexity. My own workflow for publishing a new article went from a clunky 8-step process on a heavy CMS to just updating a single file. That simplicity means less time spent on maintenance and more time actually creating.
In the end, starting with a free static host lets you build a professional, fast, and secure website with almost no effort or cost. It’s hands-down the smartest first move for almost any new web project.
Getting Your Website Files Ready for Deployment

Before you can push your site live, you've got to get your files in order. This isn't just busywork; it's the foundation for a smooth deployment. At its core, your static site is just a folder of files—HTML, CSS, JavaScript, images, and maybe some fonts. The browser gets everything it needs in one neat package.
Most free hosting platforms are looking for a simple, clean structure. They expect all your public-facing files to live inside a single main folder, which we call the root directory. The absolute most important file in there? Your homepage, which needs to be named index.html. Web servers are configured to look for that specific file by default when someone visits your site.
What If You're Using a Static Site Generator?
Things are a little different if you're working with a static site generator (SSG) like Hugo, Jekyll, or Astro. These tools are fantastic, but they add one crucial step to your workflow: the "build" process.
You write your content in a simpler format like Markdown, and the SSG compiles it all into a finished, optimized website. This process spits out a specific folder containing the final HTML, CSS, and JS files that are ready to go live.
- Hugo generates a
publicfolder. - Jekyll defaults to a
_sitedirectory. - Next.js or Astro will often create an
outordistfolder.
This generated folder is the only thing you need to upload. Don't upload your source code or configuration files. If you want a refresher on the basics, you can learn more about creating a basic site in HTML.
A clean file structure is non-negotiable for a smooth deployment. I once spent an hour debugging a broken site only to realize I had accidentally uploaded my entire project folder, including the source files, instead of just the final
distdirectory. The host didn't know where to findindex.html.
Your Pre-Flight Checklist
Before you hit that deploy button, a quick pre-flight check can save you from some common headaches down the road. It just takes a few minutes and ensures your site works perfectly from the moment it goes live.
- Check Your Links Locally: This sounds obvious, but it’s amazing how often a broken link slips through. Click through your navigation, buttons, and internal links one last time on your own machine. A 404 error is a terrible first impression.
- Compress Your Images: Large, unoptimized images are the number one performance killer. Run all your images through a tool like TinyPNG to dramatically reduce their file size without sacrificing much quality.
- Minify Your Code: Minification is the process of stripping all the unnecessary characters (like whitespace and comments) from your HTML, CSS, and JavaScript. This makes the files smaller and faster for visitors to download. Thankfully, most modern SSGs handle this for you automatically during the build step.
Nailing these simple steps is your ticket to a fast, flawless deployment.
Your Universal Deployment Workflow
Alright, you've got your website files organized and ready to go. Now for the fun part: getting it live on the internet.
This is the universal workflow that applies to pretty much any modern platform offering to host a static website for free. I'll use Hostmora as the main example here because it does a great job of showing just how quick and painless this can be. Seriously, we're talking about going from a folder on your desktop to a live, professional site in just a few minutes.
The whole process really just boils down to uploading your files, checking the preview, and then pointing your own domain name to it. All the old technical headaches have been smoothed over by today's hosting services.
Uploading and Deploying Your Site
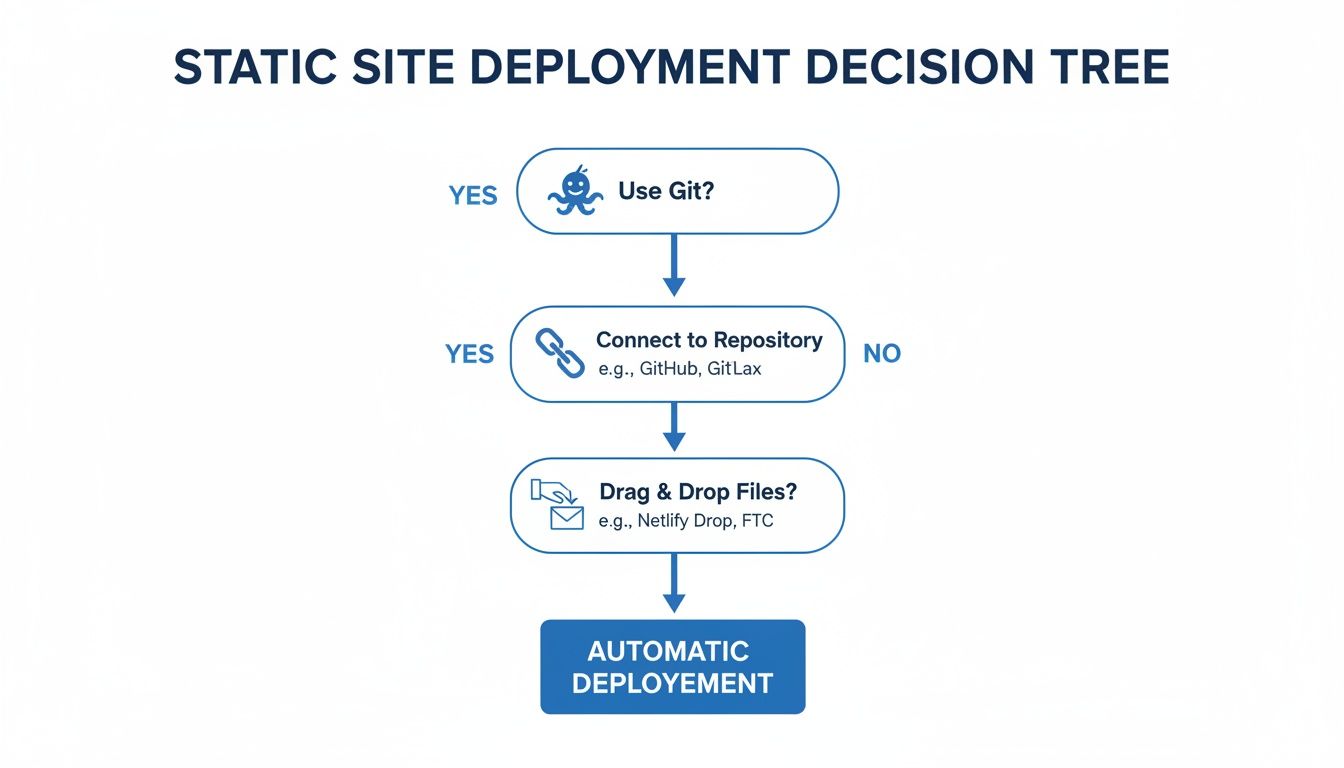
First things first, you need to get your files from your computer to your hosting provider. Most platforms give you a couple of really simple ways to do this.
- Drag-and-Drop: This is as easy as it sounds and perfect if you're not a fan of the command line. You literally just drag your website folder (that
distorpublicfolder we talked about) right into your browser window. - Git Integration: If you're using a static site generator or just prefer working with Git, connecting a repository from GitHub, GitLab, or a similar service is the way to go. This sets up an automated pipeline, so every time you push a change to your code, your website updates automatically.
Hostmora really nails the drag-and-drop method, which makes it super accessible. The moment you drop your folder, the platform starts working its magic, deploying your files across its global network and giving you a temporary preview URL almost instantly.
Other services, like Firebase, offer a similar experience. If you're weighing your options, our guide on Firebase website hosting dives into what that platform brings to the table.
I’ve launched dozens of small projects this way. The moment you see that preview link and your site loads perfectly, it’s a huge confidence booster. It proves that the "hard part" of getting online is no longer a technical barrier.
Connecting Your Custom Domain
That default URL the platform gives you (something like my-project.hostmora.site) is great for a quick check, but a custom domain (www.yourbrand.com) is non-negotiable for a professional look.
Connecting it is surprisingly straightforward. You just pop your domain name into your hosting platform's settings. It will then spit out a couple of records you need to add over at your domain registrar—that's wherever you bought your domain, like GoDaddy or Namecheap. This step is just telling the internet where to find your website's files.
Once you’ve updated those records, it can take a few minutes, sometimes up to an hour, for the changes to fully kick in across the web.
Final Checks and Going Live
With your custom domain linked up, it's time for one last look-over to make sure everything is perfect before you start sharing the link.
- Confirm SSL is Active: Any decent free host will automatically hook you up with a free SSL certificate for HTTPS. You can check this by typing
https://www.yourdomain.cominto your browser. If you see a little padlock icon, you’re golden—the connection is secure. - Test on Mobile: This is a big one. Pull up the site on your phone. Is the layout responsive? Are the buttons easy to tap? With more than 58% of all web traffic now coming from mobile devices, you can't afford to skip this.
And that's it—your website is officially live! The very next thing you should do is make sure people can actually find it. Learning how to submit your website to search engines for free is the crucial next step to get Google and others to start indexing your new site.
Exploring Different Hosting Platforms
With your files polished and ready, it’s time to pick a stage. The world of free static hosting is more competitive than ever, and that's great news for us. Big players like Cloudflare Pages, GitHub Pages, and Netlify all have incredible free tiers, making it possible for anyone to publish a website.
Each service has its own personality, though. Some are built for absolute simplicity, while others are geared for serious automation and power. Let's walk through the most popular options so you can find the perfect home for your project.
Hostmora: The Drag-and-Drop Champion
If you want to host a static website for free without ever touching a command line, Hostmora is a fantastic place to start. Its biggest strength is a dead-simple, intuitive drag-and-drop interface.
You literally just drag your website's final output folder (often named dist or public) into the browser window. That's it. Hostmora takes over, uploading your files, deploying them to a global content delivery network (CDN), and giving you a shareable preview link in seconds. This workflow is an absolute dream for portfolios, landing pages, or sending client mockups where you just need to get a site live with zero friction.
GitHub Pages: The Developer Favorite
For anyone who already lives and breathes Git, GitHub Pages feels like coming home. It’s woven directly into the GitHub workflow millions of us already use every day. You just create a repository, push your website's files, and flick a switch in the repository settings to enable Pages.
This Git-native approach makes it a natural fit for open-source project documentation, technical blogs, and developer portfolios. Your code and your live site live side-by-side, which means updating your website is as simple as a git push.
Netlify and Vercel: Powerhouses for Modern Web Apps
This is where static hosting gets really interesting. While both Netlify and Vercel offer the same easy drag-and-drop or Git-based deployments, their real magic lies in the advanced features they've built for modern web development.
They're masters of continuous integration and deployment (CI/CD). You connect your Git repository once, and from then on, they automatically build and deploy your site every single time you push a change. They also offer powerful tools that blur the line between static and dynamic:
- Serverless Functions: Need to run some backend code for a contact form or API call? You can do it without managing a single server.
- Preview Deployments: Every pull request automatically gets its own unique preview URL. This is a game-changer for reviewing changes with your team before they go live.
- A/B Testing: Many platforms have built-in tools to easily test different versions of a page to see which one converts better.
Choosing between Netlify and Vercel often boils down to your preferred ecosystem. Vercel is the creator of the wildly popular Next.js framework and provides an incredibly polished experience for it. Netlify, on the other hand, is more framework-agnostic and boasts a huge ecosystem of integrations.
Cloudflare Pages: Performance and Global Reach
Cloudflare Pages enters the ring with a massive advantage: Cloudflare's legendary global network. It offers the same seamless, Git-based workflow as its competitors—connect your repo, configure your build, and you're off.
The real differentiator here is how deeply it's integrated with the entire Cloudflare ecosystem. Your site is deployed directly to their edge network, which has a presence in over 300 cities worldwide. For your visitors, this means ridiculously fast load times, no matter where they are. For a deeper dive into all these options, take a look at our guide on the best platforms for free static site hosting.
Optimizing Your Site for SEO and Performance

Getting your website live is a fantastic first step, but the work isn't quite done. Now it's time to make sure people can actually find it and have a great experience when they do. This is where you roll up your sleeves and dig into search engine optimization (SEO) and performance tuning.
The good news? When you host a static website for free, you're already playing with a stacked deck. Static sites are naturally lightweight and incredibly fast, which is a huge green flag for search engines like Google. Your job is to simply build on that strong foundation.
Mastering On-Page SEO Basics
On-page SEO is all about the tweaks you make directly to your site’s content and HTML code. Think of it as leaving clear signposts for search engines so they can understand what each page is about and show it to the right people. You don't need to be a seasoned pro to make a real impact here.
For every page you publish, zero in on these essentials:
- Title Tags: This is the clickable headline that shows up in Google search results. Make it catchy, relevant, and try to get your main keyword in there, preferably near the start.
- Meta Descriptions: This is the short summary that appears under the title in search results. It doesn't directly affect rankings, but a well-written one can be the difference between someone clicking on your link or a competitor's.
- Image Alt Text: Always add descriptive text to your images. It's crucial for accessibility (screen readers use it) and gives search engines another clue about your page's content.
If you're serious about getting your site noticed, it's worth getting a handle on the fundamentals. For a solid overview, this guide on What is Search Engine Optimization (SEO) is a great place to start.
I once saw a client’s article jump from the second page of Google to the top five results just from a simple title tag adjustment. Never underestimate the power of these basic tweaks; they are often the easiest wins for boosting organic traffic.
Capitalizing on Static Site Speed
Site speed isn't just a nerdy technical metric—it's a core part of the user experience and a confirmed ranking factor for Google. The numbers don't lie: a one-second delay in page load can cause a 7% drop in conversions. And with 53% of mobile users bouncing if a site takes longer than three seconds to load, your static site's built-in speed is a massive advantage.
Modern free hosting platforms like Hostmora, Netlify, and Vercel are built for performance. They automatically push your files out to a global Content Delivery Network (CDN), meaning your site loads quickly for visitors whether they're in Toronto or Tokyo. They also typically handle caching for you, which helps your site load almost instantly for repeat visitors.
On your end, the main thing is to keep your files trim. Before you upload anything, run your images through a compression tool like TinyPNG. Double-check that your static site generator is set up to minify your HTML, CSS, and JavaScript, which strips out unnecessary characters. These small actions add up, creating a blazing-fast experience that keeps users happy and search engines impressed.
Your Questions About Free Static Hosting, Answered
Jumping into free hosting can feel a little too good to be true. I get it. You're probably wondering what the catch is or if there are hidden costs waiting to bite you later on. Let's tackle some of the most common questions and clear up any confusion you might have about hosting a static website for free.
Knowing the landscape—what’s included and what’s not—is the key to making a smart choice for your project. The good news is that most free tiers are genuinely powerful, but you still need to know where the guardrails are.
Can I Really Host a Website for Free… Forever?
Yes, absolutely. And I'm not talking about some shady, limited-time trial. Reputable platforms like Hostmora, GitHub Pages, and Netlify have legitimate "forever-free" tiers that are more than enough for personal projects, portfolios, and even many small business sites.
These plans come with generous bandwidth and storage limits that most smaller sites will never come close to hitting. As long as you play within their rules, you can keep your site live indefinitely without ever pulling out your credit card. It’s a real, no-strings-attached way to get online with zero financial risk.
What Are the Big Limitations I Should Know About?
The main trade-offs come down to functionality and scale. Free hosting is built for one thing: static sites. That means you can't run any server-side code (like PHP or Python) or hook up a database. This rules it out for complex e-commerce stores, membership sites, or web apps that need to generate content on the fly.
You'll also run into resource caps, like a ceiling on your monthly bandwidth or the number of "build minutes" you get. Advanced features—things like team collaboration, in-depth analytics, or password protection—are almost always reserved for the paid plans. Honestly, though, for most portfolios, blogs, and marketing sites, these limitations are rarely a problem.
One of the hidden benefits of starting with a free plan is that it forces you to build efficiently. You learn to optimize your images and keep your code clean, which are fantastic habits to have no matter what your budget is.
Is It a Hassle to Connect My Own Domain?
Not anymore. A decade ago, this could be a real headache, but modern hosting providers have made it incredibly straightforward. The whole process usually boils down to two simple steps: you tell your hosting platform what your domain name is, and then you pop over to your domain registrar (like GoDaddy or Namecheap) to point it to the right place.
Every platform provides clear, step-by-step guides, and the whole thing rarely takes more than a few minutes. Best of all, nearly every free host now throws in an automatic SSL certificate. That means you get that secure https and the little padlock icon in the browser, giving your visitors peace of mind at no extra cost.
When Is It Time to Upgrade to a Paid Plan?
You'll know it's time to upgrade when your project starts bumping up against the limits of the free tier or when you need more professional tools to grow. The most common reasons people make the leap are:
- You're getting too much traffic: A great problem to have! If your site gets popular and you start exceeding the monthly bandwidth allowance, it's time to upgrade.
- You need more advanced features: Maybe you want to A/B test a landing page, password-protect a section of your site, or dig into more detailed analytics.
- You need priority support: For a business-critical website, having a direct line to a dedicated support team can be worth its weight in gold.
Paid plans simply give you the runway and professional toolset you need to scale your project as your audience gets bigger.
Ready to get your site online in seconds? With Hostmora, you can just drag and drop your files to get a live, secure link instantly. Get started for free on Hostmora and see for yourself how simple publishing can be.